Asa 9.1 Image For Gns3 Download
Important notes about the images. Only images validated by VIRL team are known to work correctly with GNS3. Images asav952-204.qcow2 or later are recommend (previous releases may not work).It is very important to use the correct ASA image because only this image (or a later image validated by VIRL) will work with GNS3.
Cisco ASAv appliance
The Adaptive Security Virtual Appliance is a virtualized network security solution based on the market-leading Cisco ASA 5500-X Series firewalls. It supports both traditional and next-generation software-defined network (SDN) and Cisco Application Centric Infrastructure (ACI) environments to provide policy enforcement and threat inspection across heterogeneous multisite environments.
More informations on http://www.cisco.com/c/en/us/products/security/virtual-adaptive-security-appliance-firewall/index.html
- Download the appliance file: here
- Download the files for one of the supported version here
- Import the .gns3a file in GNS3. You can follow this tutorial
There is no default password and enable password. A default configuration is present. ASAv goes through a double-boot before becoming active. This is normal and expected.
RAM: 2048 MB
You need KVM enable on your machine or in the GNS3 VM.
Documentation for using the appliance is available on http://www.cisco.com/c/en/us/support/security/virtual-adaptive-security-appliance-firewall/products-installation-guides-list.html
Cisco ASAv 9.12.2-9
Images require
| File | MD5 | Size | |
| asav9-12-2-9.qcow2 | d90ada2efeb19801e654b6059de61845 | 198.0 MB | Download |
Cisco ASAv 9.12.2
Images require
| File | MD5 | Size | |
| asav9-12-2.qcow2 | ad1f8ce94417a654949ecc53d280b29f | 198.0 MB | Download |
Cisco ASAv 9.9.2
Images require
| File | MD5 | Size | |
| asav992.qcow2 | 0cba453dbf70313d8d63a00700618f52 | 205.0 MB | Download |
Cisco ASAv 9.8.4-15
Images require
| File | MD5 | Size | |
| asav984-15.qcow2 | 3c6742a9617767d8eae14b3ad4d33981 | 200.0 MB | Download |
Cisco ASAv 9.8.3-8
Images require
| File | MD5 | Size | |
| asav983-8.qcow2 | 54dbf135c545dbae40c8be61ff3863a4 | 199.0 MB | Download |
Cisco ASAv 9.8.1
Images require
| File | MD5 | Size | |
| asav981.qcow2 | 8d3612fe22b1a7dec118010e17e29411 | 193.0 MB | Download |
Cisco ASAv 9.7.1-4
Images require
| File | MD5 | Size | |
| asav971-4.qcow2 | f9a671d1ceaf983f7241f19df15e787f | 197.0 MB | Download |
Cisco ASAv 9.6.3-1
Images require
| File | MD5 | Size | |
| asav963-1.qcow2 | d6a5c8d7bff5e69c5987ca664a52dbd8 | 172.0 MB | Download |
Cisco ASAv 9.6.2
Images require
| File | MD5 | Size | |
| asav962.qcow2 | a4c892afe610776dde8a176f1049ae96 | 177.0 MB | Download |
Other versions
If you don't have this images you can try to add a new version follow instructions here.Only images validated by VIRL team are known to work correctly with GNS3.
Images asav952-204.qcow2 or later are recommend (previous releases may not work). It is very important to use the correct ASA image because only this image (or a later image validated by VIRL) will work with GNS3.
Depending of the image the console of the device could be serial or the graphical output of the VM.
If the image display to the graphical output you need to connect using VNC. Otherwise it’s with the telnet connection.
By default GNS3 appliance use the VNC output because it’s the most common case. If you need to connect via serial you will see this line at the boot:
Lina to use serial port /dev/ttyS0 for console IO
If you see that just edit the configuration of your node to change the console to telnet.
Replace the VNC console by a telnet console
If you want to able to use your terminal application instead of VNC you need to enable the serial console in the appliance.
ciscoasa#conf t
ciscoasa(config)# cd coredumpinfo
ciscoasa(config)# copy coredump.cfg disk0:/use_ttyS0
After that stop the appliance and change the console type from VNC to telnet.
See this thread if you want to create an image with ASAv serial console always enabled:
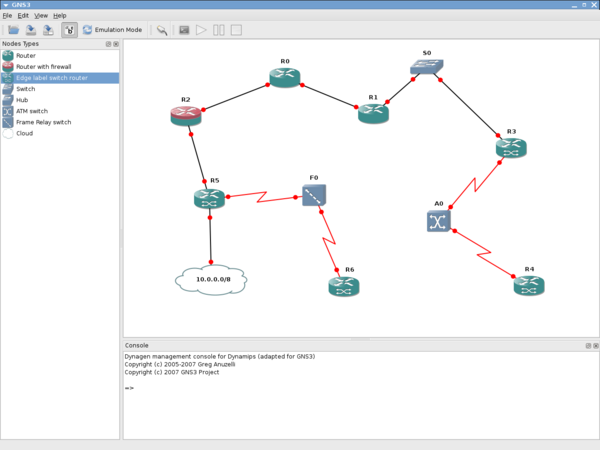
Once the ASA appliance is imported into GNS3, you can create topologies such as the following:
Medieval 2 total war spanish. The cloud is linked to an eth2 interface of the GNS3 VM. In order to have an eth2 interface in the VM in the GNS3 VM settings in VMware (not in GNS3, the parameters of the VM in VMware) add a third network adapter with host only.
We use a generic switch between the cloud and the ASAv vm because a qemu limitation of the current version of GNS3 prevent a direct link between qemu and a cloud.
Our cloud configuration:
The ASA is connected to the switch via is Management 0/0 interface.
After that boot the ASAv it will take a long time with a reboot the first time. Open the console and will see a prompt:
ciscoasa>
Switch to the configure mode (by default password is empty):
ciscoasa> enable
Password:
ciscoasa# configure terminal
ciscoasa(config)#
***************************** NOTICE *****************************
Help to improve the ASA platform by enabling anonymous reporting,
which allows Cisco to securely receive minimal error and health
information from the device. To learn more about this feature,
please visit: http://www.cisco.com/go/smartcall
Would you like to enable anonymous error reporting to help improve
the product? [Y]es, [N]o, [A]sk later: n
In the future, if you would like to enable this feature,
issue the command 'call-home reporting anonymous'.
We can now change the hostname and write the config Cummins c110d5 manual.

ciscoasa(config)# hostname gns3asav
gns3asav(config)# write
Building configuration..
Cryptochecksum: 5c5f8e54 7203401c 38a17bec c74e13c6
7413 bytes copied in 0.240 secs
[OK]
Remember GNS3 will not save this for you. When you save in GNS3 you save the design of topology not the memory of the devices. Like in the real life you need to ask the OS to save before turning it off.
Configure ASDM
In order to manage ASA with asdm we need to setup an ip on the Management 0/0 interface. Because the cloud is a VMware host only adapter we can use DHCP to do that.
ciscoasa(config)# interface Management 0/0
ciscoasa(config-if)# ip address dhcp
ciscoasa(config-if)# no shutdown
ciscoasa(config-if)# nameif mgmt
INFO: Security level for 'mgmt' set to 0 by default.
ciscoasa(config-if)# exit
ciscoasa(config)# show ip
System IP Addresses:
Interface Name IP address Subnet mask Method
Management0/0 mgmt 172.16.16.156 255.255.255.0 DHCP
Current IP Addresses:
Interface Name IP address Subnet mask Method
Management0/0 mgmt 172.16.16.156 255.255.255.0
We can see that our ASA as the IP 172.16.16.156
Now we need to enable the HTTP server
ciscoasa(config)# http server enable
ciscoasa(config)# http 0.0.0.0 0.0.0.0 mgmt
Now open https://172.16.16.156 and ignore the HTTPS certificate error.
You will see this page
Click on install ASDM launcher. And when you have ASDM on your computer opened it. Enter the IP of the ASA and OK
You will see the ASDM interface
The warning about the licence is normal. The appliance provided by Cisco is dedicated to learning not a production usage where you need to pay.
No console is showing with ASAv
Depending of the image, the serial console could be not activated. If it’s the case you need to connect to via VNC to enable the serial console see this forum post for more details:
Configuration is not saving when running ASAv on Windows
ASAv is not supported by the version of Qemu provided for Windows you need to run it using the GNS3 VM.
- воскресенье 29 марта
- 86